
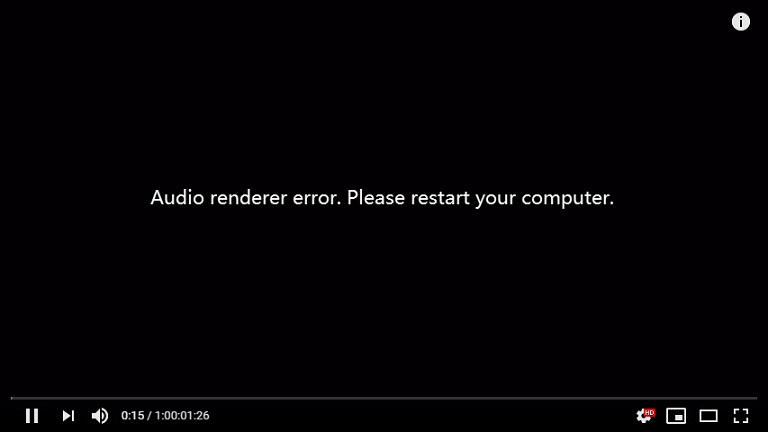
This “Audio renderer problem” has been reported by plenty of Desktop computers. While people attempt to start a Youtube clip, users get the message “First restart this system.”
The problem isn’t limited to a single Wins edition and has been estimated to increase across Chrome, Edge, Opera, plus Mozilla Firefox, among other platforms. Numerous customers who have experienced the problem say it happens whether they enjoy iTunes and use the constructed-in music player.
What Is Causing The ‘Audio Renderer Error. Please Restart Your Computer.’ Error in YouTube?
We looked into such a matter through examining quite a variety of customer complaints and also the procedures they took to either avoid or totally address the problem. Numerous possible conditions have been identified as causing similar warning alert, according to our findings:
Audio drivers malfunction – That appears to become a recurring issue with certain mobo types. Existing parties have discovered that removing > inserting their headsets, rebooting the system, or momentarily deactivating its audio drivers can potentially improve matters.
A disagreement between both the Wins Sounds with ASIO devices – This problem has been verified to occur when a person provides both the Wins Audio as well as the ASIO adapters having differing noise codec speeds. The answer inside this circumstance is to synchronise these 2 rates.
Bug BIOS edition – Regarding Dell PCs, the problem would be most commonly associated with such a faulty BIOS edition. Although Dell had fixed this vulnerability, changing their BIOS to some of the most current updates could perhaps completely address the problem.
How To Fix Audio Renderer Error ‘Please Restart Your Computer’
When you’re streaming any Youtube clip or listening to music, getting this Audio renderer malfunction may be incredibly aggravating. As a result, below seem to be some options for resolving the problem.
Once we’ve established the potential reasons, let us just move over to the probable solutions. Even though we’ve selected remedies that don’t involve changing numerous items about the system, most of them may be simple for everyone.
Method 1: Unplug/Plug Headphones
As absurd as this solution may appear, several afflicted customers have stated that the problem was cured upon unplugging and replugging their headsets. One such procedure has been tested to operate between both sockets as well as USB headsets.
Therefore, unless you’re having trouble playing a clip on Youtube, merely detach one’s headset cord if you’ve had a set attached. Take into account that it was most certainly only a momentary remedy. This “Audio renderer malfunction” will persist until you take action. The warning “Please restart your system” will reappear at some point.
Whether this strategy doesn’t work for you as well as you’re seeking for an even more long-term solution, keep scrolling towards the subsequent option.
Method 2: Restarting Your Computer
Rebooting your system, as indicated either by problem notice, may indeed repair the “Audio renderer issue.” Anomaly: “First reboot your system.” Nevertheless, the majority of those who have been impacted say that somehow this procedure (which is identical to Technique 1) is just transitory. Certain customers who are experiencing this problem have claimed that they too will barely receive 20-30 secs of multichannel audio prior to the warning notice appearing again.
Consequently, assuming Technique 1 hasn’t worked for you, reboot your pc to see whether this interim remedy assists. If somehow the problem notice reappears or you want a long-term solution, go to Procedure 3.
Method 3: Running the Audio Troubleshooter
A further possible workaround for the “Audio renderer issue” is to use a various sound exporter. The constructed sound configuration wizard can be used to resolve the “Just reboot your system” problem.
The above designed tool primarily consists of a set of fixing solutions for a number of alternative auditory issues. If indeed the difficulty is triggered by such a known problem with Ms, performing the sound troubleshooter would completely repair the problem.
For launching this sound troubleshooter, read the directions elsewhere here:
Step 1: To launch the Run dialogue field, push Wins key Plus R. Furthermore, directly access this same Troubleshooting section of something like the configurations screen, input “ms-settings:troubleshoot” or even hit Enter.
Step 2: Just go towards Get on and operate there under Troubleshoot button and select upon Streaming Sound. Afterwards, you activate this tool, select upon Start your troubleshooter.
Step 3: Sit tight till the preliminary case is settled. Afterwards, choose the equipment that’s giving us this “Audio rendering problem.” “First reboot your pc,” the message says, and afterwards users click Proceed.
Step 4: Sit tight again until software has finished analysing the Sound equipment potential issues. Whenever a problem is discovered, a remediation approach will indeed be suggested. Complete its displayed instructions (select ‘Okay, Deploy repair’ or ‘Okay, Access *menu’) then implement these modifications.
Step 5: Reboot your pc and check to verify whether the problem has gone away during the subsequent startup.
Whether the “Audio rendering issue. Must reboot your pc.” issue persists, proceed towards the subsequent procedure beneath.
Method 4: Disabling & Re-enabling The Audio Driver
Certain customers had claimed that they would be able to repair this problem without having to reboot their system or execute its fixer. It seems out though that deactivating all sound adapters in computer remote access then using those following a few moments may have been enough to fix the problem.
The above strategy is indeed the grab-run option for many impacted customers with regard towards fixing the “Audio rendering problem.” Inaccuracy: “First reboot your system.” This is how to disable and enable the sound drivers quickly:
Step 1: For launching the Run dialogue panel, push Wins key Plus R. Afterwards, to launch gadget Manager, input “devmgmt.msc” as well as hit Enter.
Step 2: Access your Audio, graphics, plus gaming consoles tab under gadget Manager. Afterwards, simply rightly-clicking then selecting Deactivate connection, disconnect each sound connector throughout the system.
Step 3: Sit tight a few moments after disabling various sound connections beneath Audio, graphics, plus gaming consoles prior to actually activating them with rightly-clicking then selecting Activate Connection.
Step 4: Revert exact activity which caused this “Audio rendering malfunction” during first place. Now reboot your pc to check whether the problem has indeed been addressed.” inaccuracy.
Proceed towards the subsequent technique beneath since you’re having problems or whether the problem reappears pretty quickly.
Method 5: Uninstall the Audio Driver
Alternative option towards resolving this “Audio rendering problem.” One solution towards the “Next reboot your system” issue is to reinstall their sound drivers. If somehow the crisis was solved by something like a technical defect, reverting to an earlier electronic edition might fix things.
Whenever users erase this sound system, Computer would compel users to reload them. That would also fix the problem if you had been working with damaged documents.
This is how to wind back this sound controller quickly:
Step 1: For launching the Run dialogue panel, push Wins key Plus R. Afterwards, to launch gadget Manager, input “devmgmt.msc” as well as hit Enter.
Step 2: Doubly-click selected media connection mostly in Sound, graphics, plus remote controls hanging menu.
Step 3: Go over to this Driver section throughout the specifications on one’s sound equipment then select Revert Back Device. Choose Disconnect Gadget whether this function isn’t accessible.
Step 4: This system should be restarted. Whenever users opt to remove these sound drivers, Wins would reload the much more recent edition of device sound connection for yourself.
Step 5: Rehash this same operation which caused this “Audio rendering problem” whenever the installation is finished. Kindly reboot your pc to check whether the problem has indeed been addressed.” inaccuracy.
Method 6: Setting The Same Sample Rate
You’re going to be faced with something like a mismatch of both the Wins Audio machine as well as the ASIO device configurations unless you only can get problems whenever Cubase gets running.
Whether such scenario describes one’s present condition, possibilities maybe you’ll be victorious to rectify it just by making sure one’s Wins Audio device as well as ASIO adapter are indeed utilising the very similar sampling frequency (for instance 44.1k versus 48k). Below is a step-by-step instruction about how to accomplish it:
Step 1: For launching the Run dialogue panel, push Wins key Plus R. Afterwards, for entering the Audio configurations screen, input “mmsys.cpl” but also click Enter.
Step 2: Go over towards the Playback section throughout this Sound panel, pick the audio system that is indeed creating the trouble, and afterwards choose Adjust.
Step 3: Try changing standard Format as 16 bits, 44100 underneath the Advance tab from one’s sound product’s Parameters display (or a variety of default form which one desires to utilise). Afterwards, for saving your sets out standards, choose Add.
Step 4: Secondly, navigate towards the Sound area under one’s ASIO adapter configurations. Once you’re there, alter its sampling frequency towards the speed which earlier set in approach 3 regarding the sound Recording style.
Step 5: Check to verify whether the dispute has indeed been addressed by restarting one’s machine.
Step 6: Though if you’re having problems with this “Audio rendering problem. If you get that “Now reboot your machine” warning, head towards the subsequent option underneath.
Method 7: Update BIOS (only confirmed on Dell computers)
Certain customers who were experiencing the problem using DELL laptops stated that perhaps the problem had permanently cured following having upgraded the BIOS settings. Although this process may work with many companies, we’ve been just able to ascertain that it works upon Dell laptops.
Remember: Whenever anybody fixes the problem with just this way on such an alternative setup, keep us informed inside the remarks area underneath.
Caution: Unless users do not however execute these correct procedures, this same procedure of rebuilding the current BIOS system might be harmful to one’s System. You must proceed at your whole responsibility whether users choose to do something with this.
These BIOS connections, and even these specific processes for upgrading its BIOS on just a DELL Computer, would vary by setup. For preventing misunderstandings, experts highly recommend reading Dell’s BIOS upgrades assistance section.
Share the exact guidelines to produce a BIOS deployment disc then upgrade ones BIOS towards the newest release when you’ve mastered the technique.
Also Read:
2) 0x80070422
Conclusion
Inside this article, we looked about what an Audio renderer problem on YouTube is, what triggers this, as well as how to solve it on a particular PC. The simplest option is to try rebooting one’s computer, upgrading device components, and checking for many other probable issues.
The incapacity of applications properly calibrated also with hardware causes the Audio renderer problem of YouTube, but this may be caused by almost any explanation or defects inside the device. There seems to be a good probability that somehow this warning is caused by a bug throughout the system.
As a result, customers might opt using a different device to prevent similar issues. We presume the information was perhaps useful, however keep us posted if you have any more suggestions for mitigating the problem.


")


