
WCore.dll file is an essential system file of the Windows Operating System, which contains a set of procedures and driver functions useful to Windows. Also called Windows live client shared Platform Module, it is associated with Live Client as the name suggests, and acts as an essential component which ensures proper operation of Windows’ applications. The WLDCore.dll file displays many errors such as loading error, entry point error, registry error, among many others.
Ways to Fix WLDCore.dll is Missing Error on Windows 10
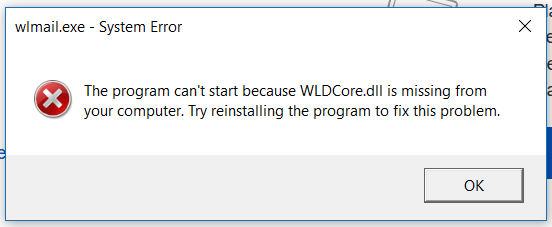
Here we are going to focus on ‘WLDCore.dll file is missing’ error. Issues with Windows’ registry, malicious software, corrupt applications, or incorrect installation of the file are common causes for this error. Whatever be the cause, here we discuss eleven ways to resolve the error to help you resolve the issue.
Method 1 – Update Your PC Device Drivers
We already know that outdated drivers can be a source of many errors. Drivers on our computer play a pivotal part in the communication of the applications and programs installed in the system and the system itself. Hence it is necessary to keep the drivers updated. To see if they need any update, follow these steps:
Step 1: Right-click on ‘My Computer‘ icon on the desktop. Then select Properties from the drop-down list.
Step 2: On the upper left corner, you will find ‘Device Manager,’ among other highlighted options. Click on it.
Step 3: A list of devices appears before you. Find any devices that have a yellow exclamation mark on them.
Step 4: If you find any such devices, right-click on them, and select ‘Update Driver.’
Once the update is finished, restart your PC and launch the application, which requires the Wldcore.dll file and see if the error comes up again. If it does, navigate to the next method.
Method 2 – Manually Register Wldcore.dll Using Microsoft Register Server
In most cases, the applications that require the ‘Wldcore.dll’ file download the file automatically. But if the error shows, it means that the application could not do that. In this case, you can download the file manually and hence resolve the issue.
Step 1: Go to the Start menu and type ‘command‘ on the search button and press Ctrl + Shift keys together and then Enter. A box appears asking for permission to run command prompt as administrator. Grant permission.
Step 2: In the terminal window, type the command ‘regsvr32 /u wldcore.dll‘ and hit Enter. This command unregisters the dll file.
Step 3: Now type ‘regsvr32 /i wldcore.dll‘ command and hit Enter. This command registers the file.
Step 4: Now close the terminal window of the command prompt.
This method first unregisters the file in case the file had been corrupted and then register it again, as is clearly evident from the above steps. Now launch the application that requires the Wldcore.dll file, and see if the error has been resolved or not, you can try the next method.
Method 3 – Repair Invalid Wldcore.dll Registry Entries
Corrupted and invalid wldcore.dll files are created when you uninstall a program, and there can be virus infections as well. But if you want to repair the windows registry manually, you need to keep a backup of the registry. To create a backup, follow the given steps:
Step 1: Go to the Start menu and type ‘command‘ on the search button. Press ctrl + shift keys together and then enter. A box appears asking for permission to run command prompt as administrator. Grant permission.
Step 2: In the terminal window, type ‘regedit‘ and hit enter. The Registry Editor window will appear before you. In the registry, select wldcore.dll related key, for instance, the Windows live Client.
Step 3: Then click on ‘export‘ from the file menu. Now select the folder where you want to save the file from the list provided in the ‘Save in‘ category.
Step 4: Name the file and make sure that before you save the file, the ‘Selected Branch‘ box in Export Range, has been checked.
Step 5: Now click on the ‘Save‘ option.
Now your backup with ‘.reg‘ the file extension has been created. Repairing the registry manually can be risky. Nevertheless, you can run the Automatic Repair, which will scan and attempt to fix any corrupt or invalid registry by going to the Recovery tab in the Update and Repair option in the Settings panel.
Method 4 – Remove or restore Wldcore.dll from Windows Recycle Bin
If the Wldcore.dll file is missing from the registry, it may have been that you accidentally deleted the file and it went to the Recycle Bin. In that case, you just need to look for it in the Recycle Bin and restore it. To do that, follow the given steps:
Step 1: Start by double-clicking on the Recycle Bin icon.
Step 2: Search for the Wldcore.dll file in the Bin. If you find it, then restore it in the directory named: C:\Windows\System32\.
Step 3: Once the file has been replaced. Restart your system and open the application, which requires the dll file and see if the error occurs again. If it does, proceed to the next method.
Method 5 – Utilize Windows System Restore to Undo Recent System Changes
System Restore is a feature in Windows that allows the user to revert their computer’s state to that of a previous time. This feature reverts system files, installed applications, Windows’ Registry and system settings to their previous state and hence helps to recover from system malfunctions. Using this method, you will not need to troubleshoot the WLDCore.dll file error.
Step 1: Type ‘System Restore‘ in the search box after pressing the Start menu and press enter. Among the options in the result list, select System Restore.
Step 2: Enter the password for the administrator login if prompted. Now all you need to do is follow the on-screen instructions and set a point to which you wish (possible to the time when the error did not show up) to restore the system.
Step 3: Restore the system and then restart your PC.
Now your PC has been restored to the point of time that you had entered, and all the settings have gone back to their previous format. It will most probably resolve the issue, and the next time you open the application which displayed the WLDCore.dll is Missing error, it won’t show up.
Method 6 – Uninstall and Reinstall the Windows Live Program Associated With Wldcore.dll
Sometimes the ‘Wldcore.dll file missing’ error occurs due to a specific program, which may have been corrupted or damaged. In that case, it is best to reinstall the application so that the part that got corrupted or outdated can be replaced by its updated and corrected version. To do that, follow the given steps:
Step 1: Select the Programs and Features option in the Start menu. In the window that appears before you, locate the application associated with Wldcore.dll file, which in this case may be Windows Live Client.
Step 2: Click on it and then select ‘Uninstall/Change‘ option located on the top and then follow the on-screen instructions for uninstallation of the program.
Step 3: After uninstall is finished, reinstall the application without any error, preferably after restarting your computer.
Once the application is reinstalled, open the application and see if the error reappears. If the error had occurred previously due to an issue with the application itself, the possibility is that it will be resolved, but if not, you can try the next method.
Method 7 – Run Windows System File Checker
The Windows System File Checker is a utility provided by Microsoft that allows the user to scan and restore corrupt files. If it finds a corrupt or a problematic file, it attempts to replace it from the dll cache. However, if this does not work either due to a corrupt dll cache file or if it is missing, the user will be prompted to insert Windows Installation Media or provide the network installation path. Since the System Files Checker is prompted by the command prompt, we will have to run the command prompt as an administrator to imply this method. To run the System Files Checker, follow the given steps:
Step 1: Go to the Start menu and type ‘command‘ on the search button and press Ctrl + Shift keys together and then enter. A box appears asking for permission to run command prompt as administrator. Grant permission.
Step 2: In the terminal window of command, prompt type ‘sfc/scannow‘ command.
Step 3: Now, the System Files Checker is scanning for corrupt files. After locating corrupt files, it replaces them, and it will take up some time to do that.
Once the process has been complete, restart your system and launch the application which had been displaying the ‘Wldcore.dll file is missing’ error. In case the dll file had been corrupted, this method would restore it in an updated and corrected condition. The error should not repeat this time, but if it still persists, go on to the next method.
Other Errors:
- Digital TV Tuner Device Registration Application
- Update Error Code 0x8024a105
- ERR_CACHE_MISS
- Windows 10 Start Menu not Working
Method 8 – Install All Available Windows Updates
Most of the time, errors are caused due to outdated Windows, and to resolve them, all it takes is a Windows update. Microsoft developers, continuously provide new updates in order to get the best performance out of the hardware as well as keep the software intact and fast as it can be. Often updates help to remove bugs and errors, and it may be implied here as well. To update Windows, follow the given steps:
Step 1: Click on the Start button and type ‘Update‘ in the search box and then press Enter.
Step 2: Windows update dialogue box appears before you.
Step 3: Now, all you need to do is install any updates available and displayed in the Update dialogue box.
It will take up some time to install all updates, and once the updates are installed, restart your computer and launch the program that displayed the error earlier and see if the WLDCore.dll is Missing error persists. If it does, try the next method.
Method 9 – Perform A full Malware Scan for Your PC
As we very well know that viruses play a huge part in causing errors, corrupting files, and sometimes even deleting them. It is quite plausible that the ‘dll file missing’ error has been caused due to Malware, which might have corrupted or deleted the Wldcore.dll file. If this is the case, the best way to deal with the issue is to run a full Malware scan of your PC and detect and remove any malware found by your antivirus.
Therefore, you need to go to your antivirus software and select the option to run a full scan in which the process runs in accordance with the antivirus software that you have installed. It will take some time, and once the scan is complete, restart your computer and launch the program and see if the error persists.
Method 10 – Do A Clean Installation of Windows
A clean installation of Windows is the last option you should pick, but in case all other methods fail, this might be your only chance to resolving the error; but before performing the clean installation, you need to have a backup of all your important data such as files and pictures and other stuff you think is important. This is a time-consuming procedure and removes all junk from your PC, and hence has a chance of fixing the ‘Wldcore.dll file is missing’ error.
To create a backup of your existing data, you can upload the data to OneDrive. You will also need to download the device drivers and create a USB bootable media to perform the clean install. Once you perform the clean install, there is little chance that the WLDCore.dll is Missing error will show up again.
Method 11 – Reinstall/Repair Applications
One other way that the ‘Wldcore.dll file is missing’ error can be resolved is by reinstalling some applications like Windows Live Mail, Windows Live Messenger, among various others. To reinstall such applications, follow the given steps.
Step 1: Open Start menu and type Control Panel in the search box. Or click on the Control Panel icon on the desktop.
Step 2: Select the ‘Programs and Features‘ option. A list of all the installed ‘Programs and Features‘ will be displayed.
Step 3: Now right click on the Windows Live Messenger if you have it installed and select repair. Do the same with Windows Live Mail and Windows Live Contacts.
Step 4: After the repair is complete, restart your PC.
Now launch the program that initially displayed the error and see if the WLDCore.dll is Missing error has been resolved.
Conclusion
Here we discussed eleven methods out of which one or more might help you to get rid of the ‘Wldcore.dll file is missing’ error. Due to the fact that fixes ranging from System Files checker through command prompt to performing a clean installation of Windows to manually registering the error have been discussed, the little grey area remains for the error to still persist.


")


