
Making a corsage out of fresh flowers isn’t hard (really), provided you have the right tools. Once you have mastered the method, producing multiple corsages or boutonnieres at once will take very little time.
produce sure you have enough flowers on hand to produce the corsage’s main component. It’s important to remember that some buds may be injured throughout the procedure, while others may not be able to collaborate due to differences in size or shape. I hope you enjoy coming up with these cute projects.
Materials Required:
- Flowers
- Clippers
- Wire
- Floral tape
- Floral filler
- Pencil
- Ribbon
- Scissors
- Pin
- Cellophane bag
Methodology with Detailed Steps
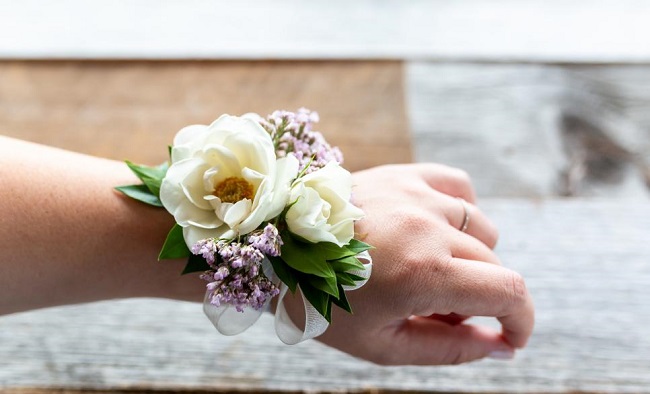
- Collect the desired blossoms for usage. Consider using a few smaller flowers as filler and one giant one as the showpiece. Corsages can be whatever size or number of flowers you like, but they look best when the flowers are arranged in clusters of three or an odd number.
- Use your clippers to remove the main part of the stem, leaving only 2 inches or so.
- Floral wire should be cut into many lengths that are 6 inches long. For each flower you want to include in the corsage, you’ll need a separate piece of wire.
- Holding the flower gently in one hand, insert the wire through the bulbous area of the flower’s base (where the stem meets the petals) and out the other side. Position the flower in the middle of the wire and bend it down so that it wraps around the stems on both sides. To include more flowers in the corsage, simply repeat the steps above.
- Start as near to the flower’s petals as you can when wrapping the flowery tape around the stem, and twist as you go. Use a spiral motion to wind the tape down the stem until you reach the bottom. Use the clippers to snip off any extra floral tape or wire. To include more flowers in the corsage, simply repeat the steps above.
- The flower should be held in one hand while the lesser flowers and filler are gathered together until the arrangement is complete. It’s up to personal preference, but most corsages have their largest flower at the base or centre. The smaller filler flowers should be placed in the background, and the larger focus flower should be displayed front and centre.
- Cover the entire corsage with flowery tape, spiralling downward. Taping the accent flowers together first may make it easier to attach them to the main flower and filler later on, depending on their size. If there is too much flowery tape, trim it off. Gather the stems together and wind them around a pencil to create a corkscrew.
- A tiny ribbon bow, either white or a colour that complements the flowers or the woman’s clothing, should be tied around the corsage.
- Insert the large pin into the corsage’s back, and then seal the entire arrangement in a cellophane bag.
- Before giving the corsage to the special lady, keep it in the fridge for as long as you can. Fresh fruit emits a gas that kills flowers, so keep it far away!
Advice on Making Corsages
Don’t give up if the first attempt at making a corsage doesn’t work out perfectly. Until the moment you pin the corsage on the recipient, you have plenty of time to rearrange the flowers and rewrap the bouquet.
Look for buds with solid stem bases, like roses, when choosing flowers for a corsage, as they will be subjected to a lot of handling. To complement the bigger flower in your corsage, you’ll also need some fillers like leaves or baby’s breath and a few other smaller flowers.


")


