
Have you been unable to resolve the red motherboard light problem? Sorry, but this is one problem that your computer cannot fix on its own. Please assist it.
Don’t worry if you have no idea what the issue is or how to start fixing it.
What Can I Do About the Motherboard’s Warning Light?
To be aware of the problem is obviously insufficient. Some solutions to this problem have been discussed above (playing with RAM or GPU). However, there are more strategies you might employ in an effort to resolve this matter.
With any luck, the accompanying guidelines will assist you in returning to your regular self. Some of these can be done quickly, while others may need the replacement of parts.
We should start right now.
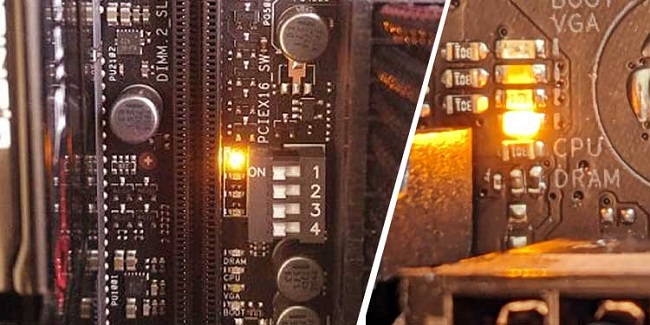
Step 1: To Reset the Integrated Circuit and Motherboard Settings
One of the simplest and most effective first steps is to perform a BIOS reset. It’s likely that this will be the last stage of your work.
The basic input/output system (BIOS) is an advanced programme required for a computer to start up normally. A small tweak in this direction can have a big impact (such as blinking red light).
But I can’t figure out how to factory reset the BIOS. To do so, simply remove the CMOS battery. After five minutes, plug it in again. The CMOS jumper is an alternate method of resetting the BIOS. The CMOS battery has a jumper on one side with three pins.
In most cases, you’ll want to set it on either of the two pins (1 and 2, or 2 and 3). The jumper should be moved to the other two pins for a period of five minutes before being moved back to its original location.
The process of getting going should now go swimmingly for you.
If the warning sign persists, you should try a different approach.
Step 2: Take Apart Devices
Time to take the motherboard out of its enclosure for a good look around. Take out anything that’s plugged into the motherboard and pull the hardware away from the board.
Do the simplest thing first, then move on to the inspections. Get a dry, smooth towel and use it to wipe down the motherboard. The same principle applies here; dust is one of the byproducts of any mechanical process.
The next step is a comprehensive examination of all hardware. Ensure that everything is in working order and then clean it.
Let’s check out the plugs and jacks now. If possible, clean the ends and pins of these connections to remove any buildup of grime. Check for misshaped pieces as well. Don’t freak out if you stumble onto something similar. Using a little screwdriver to resolve or push it can restore functionality.
Step 3: Substitute CMOS
A question arises if restarting the BIOS doesn’t stop the blinking red light. Perhaps the CMOS battery is malfunctioning. Particularly if you’re using an older computer and this is your first experience with the problem, this could occur.
If you want to fix this, try putting in a brand-new CMOS battery. But until you know for sure that the issue is localised here, you shouldn’t spend any money on it.
Conclusion
It is my sincere hope that the details provided above may prove useful in finding a solution to the problem at hand. The problem with a blinking red motherboard light has been around for a long time. Stop worrying; your computer will be just fine.


")


